摘要:所谓好记性不如烂笔头,笔者记忆力太差,虽然对linux也很熟悉,接触了三年多了,但是总是会丢三落四,以前买过的云主机都是用Windows2008,IIS配置PHP MySQL极为方便,也尝试安装了SSL证书,折腾了HTTPS ,但即便是图形界面,步骤却忘记了,所以此次配置全程记录,留已备用。
安装步骤
1.更新软件源
apt-get update
2.安装Apache2 服务器
apt-get install apache2
校验Apache2 是否正常安装
使用apache -v 查看是否正常安装
   root@iZ286x0azp7Z:~# apache2 -v
    Server version: Apache/2.4.7 (Ubuntu)
        Server built:   Jul 28 2016 20:50:32
查看端口是否正常开启
root@iZ286x0azp7Z: netstat -aunpt | grep LISTEN
tcp        0      0 0.0.0.0:80              0.0.0.0:*               LISTEN      2952/apache2
tcp        0      0 0.0.0.0:22              0.0.0.0:*               LISTEN      733/sshd
如果没用选择好配置文件 apt-get 安装 httpd.conf 默认是空没有的
root@iZ286x0azp7Z:/etc/apache2# vi /etc/apache2/apache2.conf
加上ServerName localhost:80
然后重新启动
/etc/init.d/apache2 start
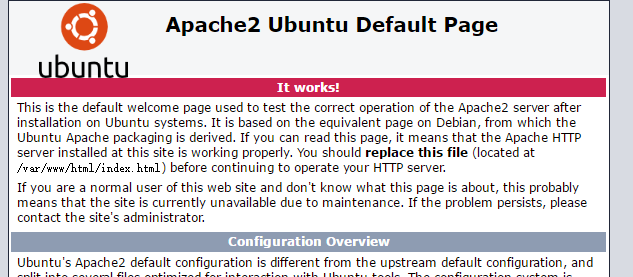
在公网输入IP地址查看Apache是否显示下画面
( 由于是apt-get的简易安装 所以web root 直接给你定在了/var/www/html/ 下面这是index.html)

3.安装PHP5
apt-get install php5
用 php5 -v 查看输出结果如下
root@iZ286x0azp7Z:~# php5 -v
PHP 5.5.9-1ubuntu4.19 (cli) (built: Jul 28 2016 19:26:04)
Copyright (c) 1997-2014 The PHP Group
Zend Engine v2.5.0, Copyright (c) 1998-2014 Zend Technologies
    with Zend OPcache v7.0.3, Copyright (c) 1999-2014, by Zend Technologies
sudo apt-get install php5-curl 如果函数curl_init(); 不存在
4.查看Apache是否已经加载libphp5.so模块,该模块是Apache用来指挥PHP解析器来执行PHP代码的模块
cat /etc/apache2/mods-enabled/php5.load
root@iZ286x0azp7Z:~# cat /etc/apache2/mods-enabled/php5.load
LoadModule php5_module /usr/lib/apache2/modules/libphp5.so
表示该模块已经加载了
5.安装MySQL数据库
由于我用的secureCRT中间会出现乱码,其实是设置问题,选项->会话选项->外观->字符编码 后面修改为UTF-8 即可
中间会弹提示输入密码,这是账号root的MySQL数据库管理员密码,输入两次即可。
apt-get install mysql-server
6.检查是否加载了mysql.so的扩展,PHP通过该扩展链接mysql执行CURD操作,
root@iZ286x0azp7Z:~# cat /etc/php5/mods-available/mysql.ini
cat: /etc/php5/mods-available/mysql.ini: No such file or directory
输入以上命令查看发现 No such file or directory 表示PHP默认没有安装该操作数据库的扩展,需要自行安装
7.安装操作数据库拓展(如果第六步成功可以跳过了)
apt-get install php5-mysql
root@iZ286x0azp7Z:~# apt-get install php5-mysql
Reading package lists... Done
Building dependency tree
Reading state information... Done
E: Unable to locate package php5-mysql
如何出现以上问题,表明需要重新更新一下源 apt-get update 在重新 apt-get install php5-mysql
root@iZ286x0azp7Z:~# cat /etc/php5/mods-available/mysql.ini
; configuration for php MySQL module
; priority=20
表示mysql.so扩展已经安装成功。
8.重启mysql和Apache
root@iZ286x0azp7Z:~# /etc/init.d/mysql restartroot@iZ286x0azp7Z:~# /etc/init.d/apache2 restart
中间问题
当中断输入 mysql -u root -p 命令提示错误解决办法
ERROR 1045 (28000): Access denied for user 'root'@'localhost' (using password: YES)
#1.停止mysql数据库
/etc/init.d/mysql stop
#2.执行如下命令
mysqld_safe --user=mysql --skip-grant-tables --skip-networking &
#3.使用root登录mysql数据库
mysql -u root mysql
#4.更新root密码
mysql> UPDATE user SET Password=PASSWORD('newpassword') where USER='root';
#5.刷新权限
mysql> FLUSH PRIVILEGES;
#6.退出mysql
mysql> quit
#7.重启mysql
/etc/init.d/mysql restart
#8.使用root用户重新登录mysql
mysql -u root -p
Enter password: <输入新设的密码newpassword>
MySQL数据库操作命令http://www.rainfly.cn/?post=161
9.给php安装常用扩展
apt-get install php5-gd curl libcurl3 libcurl3-dev php5-curl
10.安装完成之后,重启Apache
/etc/init.d/apache2 restart
配置多虚拟主机(这里是将www/目录下放置多个web站点,占未测试 )
1.创建虚拟目录
现在需要安装虚拟主机,我添加一台虚拟主机命名为rainfly
首先,让我们为rainfly这个站点创建一个目录:
mkdir -p /var/www/rainfly/public_html
2.设置所有者和权限
上面目录现在只有root拥有权限。我们需要修改这2个目录的拥有权给普通用户,而不仅仅是root用户。
chown -R $USER:$USER /var/www/rainfly/public_html/
“$USER”变量指向了当前的登录用户。
设置读写权限给apache网页根目录(/var/www)及其子目录,这样每个人都可以从目录中读取文件。
chmod -R 755 /var/www/
这样,我们就创建好了一些文件夹来保存网络相关数据并分配必要的权限和所属用户。
3.为虚拟主机创建示例页面
现在,我们给网站增加示例页。第一步,让我们给虚拟主机rainfly创建一个示例页。
给rainfly虚拟主机创建一个示例页,
vi /var/www/rainfly/public_html/index.html
添加以下内容:
<html><head><title>www.rainfly</title></head><body><h1>Welcome To rainfly website</h1></body></html>
保存并关闭文件。
4.创建虚拟主机配置文件
默认情况下,apache有一个默认的虚拟主机文件叫000-default.conf。我们将会复制000-default.conf文件内容到我们新的虚拟主机配置文件中。
cp /etc/apache2/sites-available/000-default.conf /etc/apache2/sites-available/rainfly.conf
确保虚拟主机配置文件末尾包含.conf扩展名。
现在,修改rainfly.conf 文件以符合需求。
vi /etc/apache2/sites-available/rainfly.conf
使相关的变化直接呈现在rainfly站点中(译注:以“#”开头的注释行可以忽略。)。
<VirtualHost *:80># The ServerName directive sets the request scheme, hostname and port that# the server uses to identify itself. This is used when creating# redirection URLs. In the context of virtual hosts, the ServerName# specifies what hostname must appear in the request's Host: header to# match this virtual host. For the default virtual host (this file) this# value is not decisive as it is used as a last resort host regardless.# However, you must set it for any further virtual host explicitly.#ServerName www.example.comServerAdmin webmaster@rainflyServerName rainflyServerAlias www.rainflyDocumentRoot /var/www/rainfly/public_html# Available loglevels: trace8, ..., trace1, debug, info, notice, warn,# error, crit, alert, emerg.# It is also possible to configure the loglevel for particular# modules, e.g.#LogLevel info ssl:warnErrorLog ${APACHE_LOG_DIR}/error.logCustomLog ${APACHE_LOG_DIR}/access.log combined# For most configuration files from conf-available/, which are# enabled or disabled at a global level, it is possible to# include a line for only one particular virtual host. For example the# following line enables the CGI configuration for this host only# after it has been globally disabled with "a2disconf".#Include conf-available/serve-cgi-bin.conf</VirtualHost>
修改虚拟主机文件后,禁用默认的虚拟主机配置(000.default.conf),然后启用新的虚拟主机配置,如下所示。
sudo a2dissite 000-default.conf
sudo a2ensite rainfly.conf
sudo a2ensite unixmen2.local.conf (已经使root用户不用sudo)
最后,重启apache服务器。 /etc/init.d/apache2 restart
就是这样。现在,我们成功地配置了apach虚拟主机在我们的Ubuntu服务器上
参考文献:http://httpd.apache.org/docs/2.4/


评论一下?